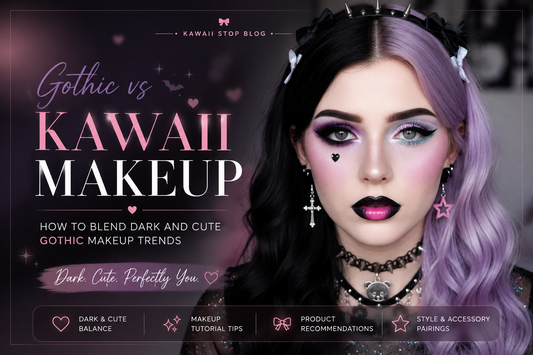


Kawaii Makeup Tutorials: A Beginner's Guide to Adorable Essentials
Kawaii Makeup Tutorials: A Beginner's Guide to Adorable Essentials
Kawaii makeup tutorials are basically the “cute coding language” of beauty: soft color, playful detail, and a finish that makes your face feel like a character design (but still wearable). If you are brand new, the goal is not perfection. The goal is a simple routine you can repeat, then upgrade later with one fun detail at a time: glossy lips, a tiny heart under the eye, or a blush placement that looks like you just ran into your crush. This guide breaks down what kawaii makeup actually is, where it comes from, how to build an adorable starter kit, and a beginner-friendly step-by-step look you can do in under 10 minutes.
Quick takeaway: Kawaii makeup is less about heavy contour and more about soft focus skin, brightening eyes, and a cute “point” (gloss, blush, shimmer, or a tiny graphic detail). Build a base routine first, then add one signature element.
Table of Contents What Kawaii Makeup Actually Is (and what it is not) Cultural Context: Where the cute look comes from Kawaii Makeup Styles at a Glance (3 beginner lanes) Beginner Tutorial: A simple kawaii look step by step Adorable Essentials: Build your kawaii starter kit Recognition Checklist: Does it read kawaii? Common Mistakes (and quick fixes) Who This Suits Best (and how to adapt) Trend Context: What is popular right now Try Your First Look (easy shopping pathways) FAQs
What Kawaii Makeup Actually Is (and what it is not)
Kawaii makeup is a cute-forward makeup style that uses soft color, brightening placement, and playful details to create a gentle, youthful vibe. Think: glowy cheeks, glossy lips, sparkly lids, and eyes that look wide and friendly.
What it is not: it is not “full glam by default,” and it is not only one face shape or one aesthetic. You can do kawaii with minimal product, with bold color, with anime-inspired lash placement, or with a clean “soft girl” finish. The difference is the intentional cute point and the way the colors are placed to feel sweet instead of sharp.
- Core idea: make features feel soft and inviting (not harsh or overly snatched).
- Signature elements: blush placement, glossy lip, and light-catching eye detail.
- Beginner win: one cute focal point is enough. You do not need every trend at once.
Cultural Context: Where the cute look comes from
“Kawaii” (cute) became a major visual language in Japan through pop culture, character goods, and youth street style. In places like Harajuku, cute style is often treated like a full outfit concept: hair, accessories, makeup, and even the tiny details (like sticker motifs or pastel color repetition) work together.
Over time, kawaii makeup picked up influence from multiple beauty scenes: Japanese “doll” and “sweet” looks (round cheeks, bright eyes), K-beauty skin-first techniques (glowy base, blur textures, juicy lips), and anime-inspired eye styling (sparkle, gradient, and cute under-eye emphasis). Modern kawaii is flexible: you can keep it subtle for school or work, or go full character energy for concerts and photos.
If you want quick browsing paths: Cosmetics, Skin Care, and Cosmetic Bags.
Kawaii Makeup Styles at a Glance (3 beginner lanes)
If you feel overwhelmed, pick one lane first. You can mix later, but choosing a “default vibe” makes shopping and tutorials way easier.
| Lane | Fast Visual Cues | Best Starter Products | One easy signature detail |
|---|---|---|---|
| Soft Sweet | Blurred skin, pink cheeks, glossy lips | Blush stick + gloss/tint + simple shimmer | “High blush” (upper cheek, a little toward nose) |
| Anime Glow | Bright under-eye, sparkly lid, playful blush | Pressed shimmer pigment + blush + lip tint | Tiny sparkle on inner corner + under-eye center |
| Cute Graphic Pop | Clean base, one bold liner or shape detail | Graphic liner + neutral shimmer + gloss | Little heart, dot, or mini wing (keep it small) |
Beginner rule: choose one “special effect” per look (extra blush, extra sparkle, or graphic liner). If you stack all three, it can read messy instead of cute.
Beginner Tutorial: A simple kawaii look step by step
This is a “cute everyday” routine you can do fast. It works even if you are not confident with eyeliner. The technique is more important than having a huge kit.
The 8-step kawaii starter look (under 10 minutes)
- 1) Prep skin: moisturizer first. If you are oily, keep it light. If you are dry, press it in and wait 60 seconds.
- 2) Even out (optional): apply a thin base only where you need it (center face). Kawaii looks best when it stays airy.
- 3) Soft blush placement: place blush on upper cheek, then blend upward (not downward). Add a tiny touch across the nose if you want extra “cute.”
- 4) Simple eye wash: tap one shimmer shade on the lid with a finger. Keep the outer corner soft, not sharp.
- 5) Inner corner sparkle: add a small highlight point at inner corner (this is the “bright eyes” trick).
- 6) Optional tiny liner: if you do liner, keep it short and lifted. Think “baby wing,” not dramatic cat eye.
- 7) Juicy lips: tint first (center), then gloss or balm on top. This creates that plush gradient look.
- 8) Final check: step back. If one area is loud (sparkle), keep the rest softer (blush and lips).
A quick placement trick that changes everything
If your blush always looks “off,” it is usually because it is too low. For kawaii, aim higher: start on the upper cheek, blend toward temple, and keep the edges fuzzy. Low blush can look tired. High blush looks lively.
Want quick searches? Lip Tints, Blush, Shimmer Eyeshadow.
Adorable Essentials: Build your kawaii starter kit
A beginner kit should be small, repeatable, and cute enough that you actually want to use it. Here is the easiest way to build it without buying random things that do not work together.
The “3 + 1” starter kit formula
- 3 core products: blush, lips, and a simple shimmer.
- + 1 helper: skincare (moisture) or a tool that makes application easier.
Starter Kit Picks: Soft skin + juicy color
These are beginner-friendly “anchor” items. The vibe: hydrated base, cute blush, and lips that look plush instead of flat.
Shop Kawaii Makeup Essentials (Beginner Anchors)
Build a simple routine first: one lip, one blush, one skin helper. Then repeat the look until it feels automatic.

Juicy Tint
Vegan Again Juicy Glossy Lip Tint Balm
Easy “your lips but cuter.” Tap it in the center, blend outward, then add a tiny gloss layer for a plush gradient.
Try the Gradient Lip
Pillow Lips
Pretty Filter Lip Plumping Gloss Mask Night 14ml
Kawaii looks love a soft glossy finish. Use this at night, then wake up to lips that make any tint look smoother.
Boost the Juicy Finish
Anime Flush
Anime Color Changing Blush - Clear Quartz
Beginner-friendly because you can build slowly. Start with one tap, blend high on cheeks, then add a second tap if needed.
Get the Cute Cheek Glow
Glossy Pop
Vegan Again Juicy Plumping Lipstick Gloss Glow
Perfect “one product lips.” Apply lightly, then press edges with a fingertip for a softer, sweeter finish.
Make Lips Look Plush
Skin Helper
Natural Face Serum - Vitamin E
Cute makeup sits best on comfortable skin. Use a small amount so base products blend instead of catching.
Prep for Smooth Makeup
Blush Stick
Vegan Again Radiance Best Blush Stick Makeup
Fast application for beginners. Dot, then blend upward with fingers for a soft “just happy” cheek.
Practice the High BlushTools + sparkle: the “adorable detail” layer
Once your base is easy, you add the fun. This is where kawaii makeup starts to feel like a character: a cute bag, a sparkly lid, and a tool that makes application feel playful (and less scary).
Shop Cute Add-Ons (Sparkle, Storage, and Tools)
These are “quality of life” upgrades. Pick one shimmer you love, one cute storage piece, and one tool that makes blending easier.

Cute Storage
Kawaii Plush Makeup Bag
A beginner hack: a dedicated pouch keeps your “starter kit” together, so you actually practice the same look consistently.
Build a Mini Kit
Sparkle Tap
Moonlit Masquerade Sparkle Eyeshadow
Finger-friendly shimmer. Tap on the center lid for instant “anime sparkle” without needing complex blending.
Add the Sparkle Point
Cute Shine
Cloverlight Pressed Pigment Eyeshadow
A single special shade can carry the whole look. Keep the rest minimal and let the shimmer be the star.
Choose Your Hero Shade
On-the-Go
Kawaii Star Kirby Plush Cosmetic Bag
Keep your “touch-up trio” inside: tint, blush, and a shimmer. That is all you need for cute refreshes.
Pack a Touch-Up Trio
Gloss Palette
Bestie Lipgloss Palette with Silicone Brush
Great for experimenting without overthinking. Try a lighter center, deeper edges, and blend for a cute gradient.
Play With Gloss Gradients
Blend Helper
Magical Heart Wand Makeup Brush
A cute tool makes practice feel fun. Use light pressure and small circles to keep blush edges soft and dreamy.
Make Blending EasierExplore more: Cosmetic Bags and Glitter Eyeshadow.
Recognition Checklist: Does it read kawaii?
Use this as your “mirror checklist.” If you hit most of these, you are in kawaii territory even if your liner is not perfect.
- Soft edges: blush and shadow look blended, not sharply striped.
- Bright points: inner corner, center lid, or cheek highlight catches light.
- Cute focus: one area is the main character (gloss, blush, shimmer, or tiny graphic).
- Youthful placement: blush sits higher, eyes look open, not dragged down.
- Cohesive color story: lips and cheeks feel related (same family, not random).
Common Mistakes (and quick fixes)
Most beginner issues are not “bad makeup.” They are just placement and product amount.
- Mistake: too much product at once. Fix: apply in thin layers and build slowly (especially blush and shimmer).
- Mistake: harsh lines (liner, shadow, or blush edges). Fix: soften edges with a clean fingertip or brush, then stop.
- Mistake: mixing too many “cute details.” Fix: pick one special effect per look and keep the rest simple.
Who This Suits Best (and how to adapt)
Kawaii makeup is flexible, so it can work for almost anyone. The key is choosing the intensity that matches your comfort level.
- Beginners who want a repeatable routine: go “Soft Sweet” first (blush + tint + shimmer).
- People who love playful details: add one small graphic element (tiny heart, dot, or micro wing).
- Anyone who wants brighter-looking eyes: focus on inner corner sparkle and a soft under-eye bright point.
Adaptation tip: If you prefer subtle makeup, keep blush and shimmer soft and let lips be your only glossy statement.
Trend Context: What is popular right now
Modern kawaii makeup leans into juicy textures and simple sparkle rather than heavy contour. The “cute” signal is often created by one small detail (high blush, a glossy gradient lip, or a sparkle point) instead of a full face of complicated steps. The best part: that makes it super beginner-friendly.
Try Your First Look (easy shopping pathways)
If you want your first kawaii look to feel easy, start here: one blush, one lip, one shimmer. Practice the same look three times, then add one extra detail.
Soft reminder: you do not need a huge kit. Kawaii makeup is about placement and vibe, not product overload.
FAQs
What is the easiest kawaii makeup look for beginners?
A simple routine: moisturizer, a high-placed blush, one shimmer shade on the lid, and a glossy tint. Keep liner optional and tiny.
Do I need foundation for kawaii makeup?
Not necessarily. Many kawaii looks work best with a thin base or no base at all. If you use foundation, apply lightly and focus on the center of the face.
How do I make my eyes look bigger in a cute way?
Use bright points: inner corner sparkle and a soft shimmer at the center of the lid. Keep outer corners blended and avoid dragging liner downward.
Why does my blush look too strong?
Usually it is product amount or placement. Start with one small tap, blend upward, then build. If it is too strong, soften edges with a clean brush or fingertip.
How do I keep kawaii makeup from looking messy?
Pick one “special effect” per look (extra blush, extra sparkle, or a graphic detail). Keep everything else soft and cohesive.
Tags:
Previous
Anime Kpop Fashion: Where Anime Meets K-Pop Style
Next
10 Enchanting Ways to Style Your Lolita Dress for Every Season
Related articles
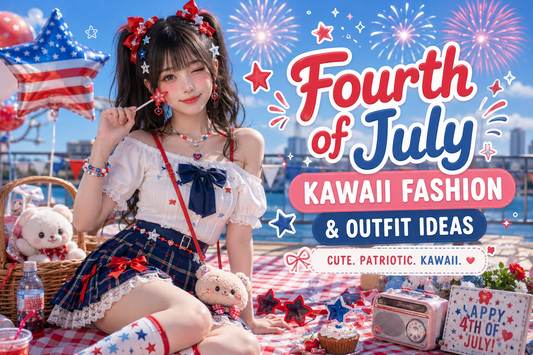
Fourth of July Kawaii Fashion & Outfit Ideas
Jul 03 2026
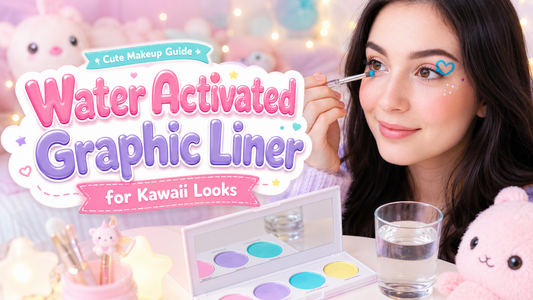
Water Activated Graphic Liner for Kawaii Looks
Jul 02 2026
Citlali Dakimakura Guide for Anime Fans
Jun 30 2026